SiliCloud Help Document Center
search
Popular search terms
Wordpress website building series - how to resolve the domain name to the server
Domain name resolution is the process of matching a domain name with an IP address, so that when accessing the domain name, the corresponding server and website can be found. In this tutorial, I will show you how to do domain name resolution.
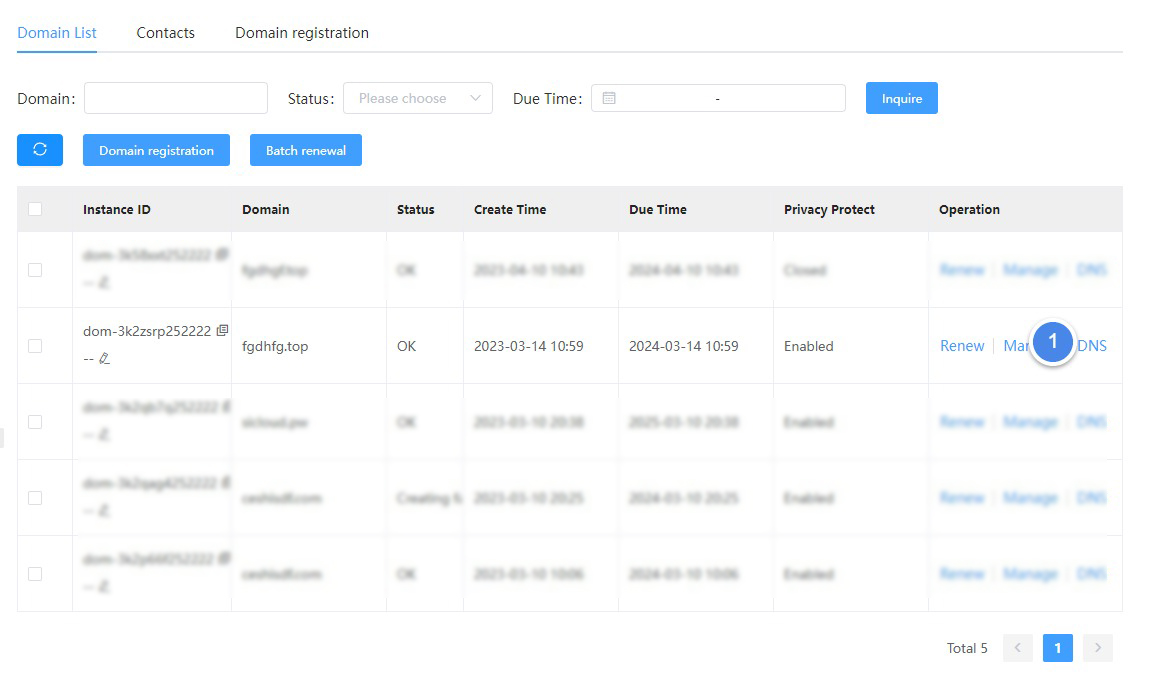
Step 1: Go to the DNS settings page
Once you are logged into your account, you need to go to the DNS settings page. DNS, short for Domain Name System, is responsible for resolving domain names into IP addresses.
On the DNS settings page, you can set the IP address that your domain name points to, or set other DNS records, such as MX records or CNAME records.[1]Click DNS
Step 2: Add or modify DNS records
On the DNS Settings page, you need to add new DNS records.Click [1] + New record
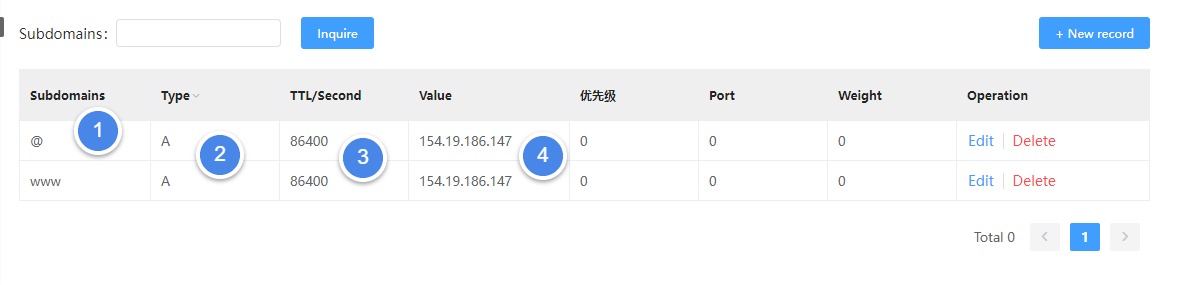
step description
- Domain name prefix, usually add www and @ (@ stands for empty)
- Record type, website resolution is usually A record
- Enter 86400
- Enter the IP address of the server you purchased (that is, the public network IPv4)
Step 3: Wait for DNS to take effect
Once you add or modify DNS records, you need to wait for DNS to take effect. Usually, it takes some time for DNS records to take effect, depending on the DNS server and other factors. Generally speaking, it takes several minutes to several hours for DNS records to take effect.
Step 4: Test whether your domain name resolution is successful
Once the DNS records are valid, you can test whether your domain name resolution is successful. You can enter your domain name in your browser to see if you can access your website. If your domain name resolves successfully, you should be able to access your website.
or use
Ping tool to test whether the connection between the domain name and the server is successful
Summarize
The above are the steps of domain name resolution. Log in to your domain name management background, find the DNS settings page, add or modify DNS records, wait for DNS to take effect, and test whether your domain name resolution is successful. Through these steps, you can easily perform domain name resolution to ensure that your domain name matches your IP address, making access to your website easier and more convenient.
further reading
- DNS records include A records
- MX records
- CNAME records, etc.
An A record is a record that points a domain name to an IP address, an MX record is a record that associates a domain name with an email server, and a CNAME record is a record that associates a domain name with another domain name. To add or modify DNS records, you need to enter the corresponding record values, such as IP address, mail server, etc., and then save the changes.
Related Doc
Do you have any suggestions for this document?